Stop Buying Mass-Produced Art: Try These 3 DIY Wall Hacks Instead
Let’s be real for a second. You’ve walked past that blank wall approximately 400 times this month, thought “I really need to do something with that,” and then… made a snack instead. No judgment. We’ve all been there.
But here’s the thing: you don’t need a design degree, a big budget, or a Pinterest-perfect craft room to make your walls look amazing. You just need a few solid ideas and something to finally push you off the couch.
These 10 DIY wall decor projects are genuinely creative, surprisingly doable, and honestly impressive enough that your guests will probably ask where you bought them. One of them even involves plastic spoons, and trust me, it works.
1. Spiral Paper Flower Wall Arrangement That Looks Like a Living Garden
This one is basically wall art and a garden in one, minus the watering and the dead plants.
Picture a large spiral of paper vines and leaves sweeping across a cream-colored wall in two connected loops. Along the vine, individual paper flowers bloom in white, orange, pink, red, purple, and yellow. Each flower has layered petals and a defined center. The green leaves appear throughout in multiple shades, and the whole thing gives the impression of a garden frozen mid-growth.
What makes it work: The scale and color variety. Each flower is big enough to read clearly from across the room, and the range of tones keeps your eye moving along the spiral. The cream wall lets every color pop without any visual competition.
How to Make It
- Cut a vine shape from craft wire or thin cardboard and attach it to the wall with removable adhesive strips
- Cut flower petals from cardstock in your chosen color palette
- Build each flower around a rolled center, then layer petals outward in concentric rings
- Use cardstock for structure or crepe paper for a softer, more organic look
- Vary the spacing between flowers instead of placing them at even intervals (this is the secret to making it feel natural and not robotic)
2. Enchanted Forest Mirror with Moss, Mushrooms, and Botanical Magic
Okay, this one stopped me mid-scroll too. It looks less like a DIY project and more like something a film set designer spent three weeks on.
The mirror is oval with a frame built from plaster or air-dry clay in an irregular, organic shape that mimics bark or eroded stone. Every inch is covered in dense preserved moss in deep green, with patches of lighter green and golden tones. Pink-capped mushrooms line the bottom. Tiny white wildflowers and leafy plants grow around the sides. A white butterfly rests at the top right.
The real magic: The frame is a 3D botanical world, and the mirror is a reflective one. They exist side by side, and the visual depth you get is something you genuinely cannot buy off a shelf.
How to Make It
- Start with a large basic mirror and build up the frame using expanding foam or air-dry clay
- Shape the edges into rough, organic forms and let it dry fully
- Apply preserved sheet moss (not fresh, it won’t survive indoors) using strong craft adhesive
- Add resin mushrooms, silk wildflowers, and preserved lichen
- Scale the size to match your wall space and your patience level (no shame in going smaller)
3. Geometric Paper Snowflake Medallions in Bold Colors
These prove that precision and color are basically a power couple.
Two paper medallions sit on a light wood surface. The top one is soft sky blue with eight symmetrical segments, each carved with pointed petal shapes and small diamond cut-outs. A pearl bead sits at the center. The lower medallion uses rich magenta with a slightly lighter inner ring. Both have a three-dimensional quality because the inner petal sections fold slightly upward from the flat base.
The geometry is immaculate. Hang five to seven of these in varying sizes across a wall in navy, blush, sage, and cream, and you’ve got a sophisticated, textural installation for basically zero dollars.
How to Make It
- Fold a square sheet of cardstock into eighths
- Draw your petal and cut-out pattern along the folded edge
- Cut carefully through all layers before unfolding
- Replace the pearl center with a button, a brad, or a decorative gem
- For the raised inner section, score and fold a slightly smaller version and layer it on top, securing only at the center point
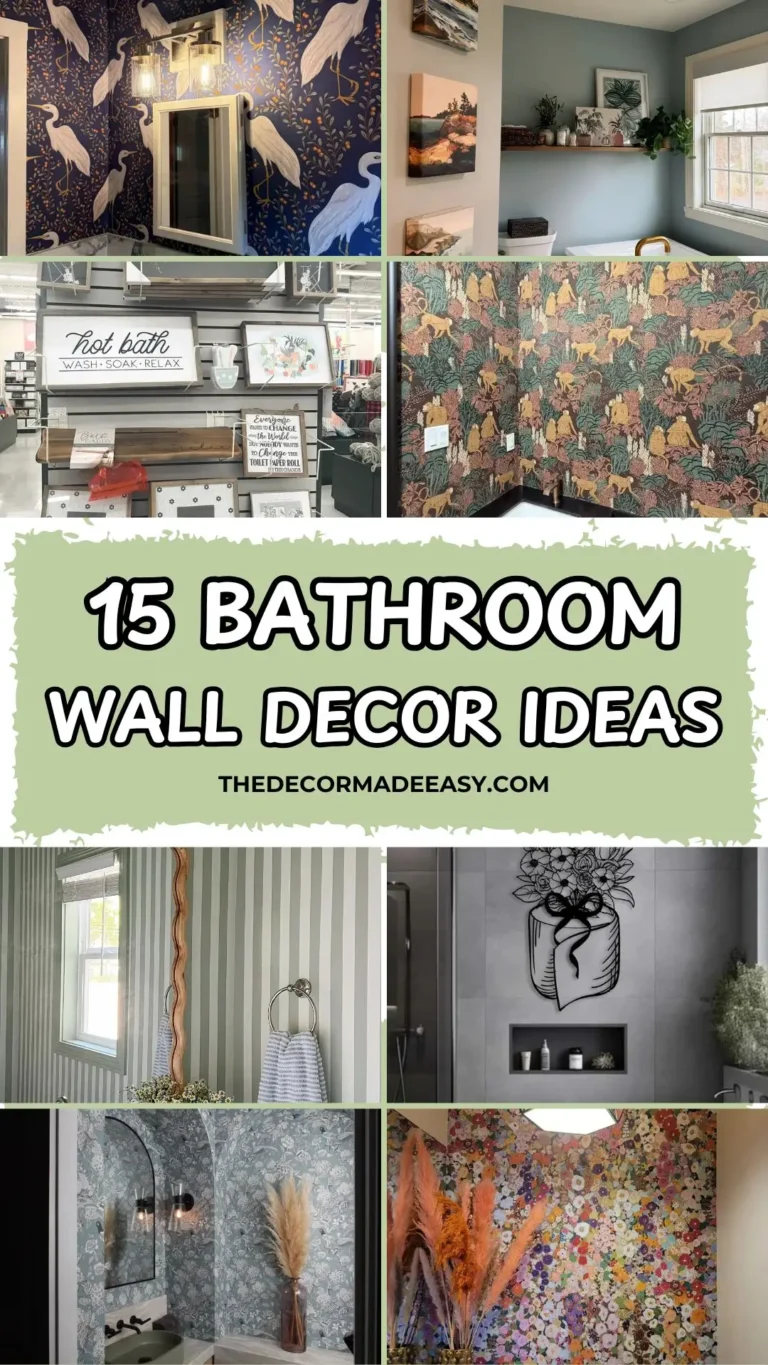
Also Read: Beyond the Frames: 15 Wall Decor Ideas That Actually Work
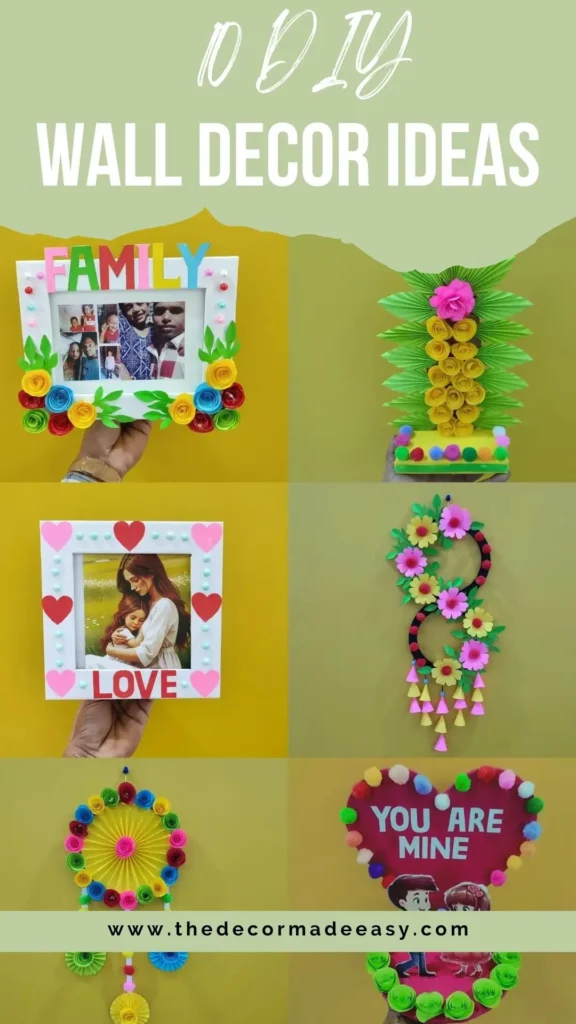
4. Paper Craft Collage with Frames, Flowers, and Hangings
This is six DIY wall decor ideas rolled into one image, and honestly, each one deserves its own moment.
Here’s what’s in the mix:
- A photo frame bordered with rolled paper roses in red, yellow, blue, and green, with “FAMILY” spelled in foam letters across the top
- A sculptural pineapple arrangement with accordion-folded green paper leaves and yellow rolled roses stacked in tiers
- A romantic frame decorated with red and pink hearts and the word “LOVE” in block letters
- An infinity-symbol wall hanging in black, trimmed with paper daisies and cone-shaped tassels
- A circular paper fan rosette mobile with rolled roses in rainbow colors and pom-pom accents
- A heart-shaped display board in deep pink, bordered with rolled roses and foam pom-poms
What ties all six together: The technique of rolling paper strips into tight rose shapes. Learn that one skill and you can recreate every single piece here. IMO, the infinity-symbol hanging is the most versatile. It works in a living room, bedroom, or hallway, any time of year.
How to Make the Infinity Hanging
- Cut the infinity shape from black foam board
- Wrap the edges with paper strips
- Add paper roses and hanging cone tassels
- Done. It’s genuinely that straightforward.
5. Painted Cardboard Sun, Clouds, and Rainbow for a Child’s Room
The best DIY wall decor is often the cheapest. This is proof.
A child’s hands place hand-painted cardboard shapes on a white wall. There’s a rainbow with distinct color bands arching over two rounded blue clouds, a speckled blue cloud decorated with hand-painted stars, hearts, and dots, and a smiling sun with closed eyes, rosy cheeks, and golden-brown cardboard rays.
The imperfection is the entire point. The rough edges, uneven marker strokes, and slightly wobbly shapes signal that a real person made this. In a child’s space, that carries genuine warmth that no store-bought print ever could.
How to Make It
- Cut shapes from flattened cardboard boxes using scissors or a utility knife (you handle this part)
- Let the kids do all the painting and decorating
- Use acrylic craft paint for the base colors and markers for the details
- Mount with adhesive foam strips on the back so there’s no wall damage when you eventually take them down
6. Jute-Wrapped Crescent Moon with Botanical Accents
Neutral, textural, and quietly beautiful. This is the kind of DIY wall decor that makes people ask where you bought it, and you get to smugly say you made it yourself.
A crescent moon shape, built from a foam or wire base, is wrapped entirely in natural jute twine. At the top, a burlap bow with a wooden button serves as both decoration and hanging point. The inner curve holds a cluster of frosted pine cones, red holly berries, and sprigs of pine. Four jute-wrapped elements hang from the bottom tips: a large wrapped sphere, a small burlap sack, and two flat coiled circles.
The restraint of the color palette is everything. Tan, brown, cream, dark green, and a pop of red. Nothing competes. Everything works together.
How to Make It
- Buy a foam crescent moon form from a craft store, or cut one from thick foam board
- Wrap tightly with jute twine, securing the start and end with hot glue
- Make hanging ornaments by wrapping foam balls and cardboard coils in the same twine
- Swap the holiday botanicals for dried eucalyptus or dried orange slices to make it work year-round
Also Read: 10 Mirror Wall Decor Ideas That Will Completely Transform Your Space
7. Plastic Spoon Mirror Frame That Looks Like Hammered Silver
I’ll be straight with you. When I first heard “plastic spoon mirror frame,” I mentally filed it under “craft fails.” Then I saw the finished result and completely changed my mind.
The process shows four stages: cutting the spoon bowls from their handles, preparing a wooden disc with a circular mirror insert, gluing the cut spoon bowls in overlapping rows around the mirror, and then the big reveal. The finished piece is a circular mirror with a lush, layered frame of overlapping spoon bowls, all painted in metallic silver-gray. It looks like hammered metal petals or a chrysanthemum in full bloom.
The spray paint transformation is genuinely wild. Before painting it looks like a school art project. After two coats of metallic silver spray paint, it looks like something from a design boutique.
How to Make It
- Cut the bowls from roughly 150 to 200 plastic spoons
- Glue them in overlapping rings around a mirror, starting from the outer edge and working inward
- Offset each row slightly from the one before to create depth
- Apply two coats of metallic spray paint
- Hang it in an entryway or bathroom where the reflective quality of both the mirror and the metallic finish can do their thing
8. Autumn Branch Wall Art with Paper Leaves and a Painted Frame
This piece bridges the natural world and the crafted one in a way that’s more striking than either could be alone.
A dark chocolate-brown painted rectangular frame holds an arrangement of real branches painted in a near-black tone. Against a slate-gray background, vibrant orange paper leaves, each one folded down the center to create a three-dimensional ridge, attach along every branch. The leaves range in size and are placed naturally, avoiding any stiff symmetry. Some leaves extend beyond the frame edge, which blurs the boundary between the frame and the composition and makes the whole piece feel alive.
The contrast is the visual engine here. Warm, almost glowing amber-orange against near-black creates a tension that keeps the eye engaged. Switch to deep red for a moodier feel, or go yellow to lighten the whole composition.
How to Make It
- Find a plain rectangular frame at a thrift store and paint it dark brown or black
- Gather thin branches outside, paint them to match the frame, and secure them inside using strong craft adhesive or small eye hooks
- Cut leaf shapes from orange cardstock in a mix of sizes, fold each along its center line, and glue onto the branches
- Start with larger leaves at the base and work upward with progressively smaller ones
- Let some poke through the frame edges on purpose. It makes the whole thing feel intentional.
9. Colorful Paper Cone Wind Chime Wall Hanging
This is pure celebration on a wall. It earns every bit of that description.
Against a dark wood-grain background, a horizontal black rod hangs from a yellow triangular cord. From the rod, seven strands of pearl beads descend at even intervals, each connecting a cascading sequence of paper cones in vivid blue, green, yellow, pink, and dark purple. Each strand grows longer than the one beside it, creating a triangular V-shape overall. The varying lengths add movement and rhythm that a straight-edged hanging could never pull off.
FYI: This style draws from South Asian and Indian craft traditions, where paper and fabric cone hangings are used for festivals. That festive quality is exactly what makes it work as a permanent installation. It brings the feeling of an occasion without needing one as an excuse.
How to Make It
- Cut squares of cardstock (roughly 4×4 inches) and roll them into tight cone shapes, securing with tape or glue
- String cones onto lengths of beading wire or nylon cord, interspersed with pearl or wooden beads
- Attach strands to a wooden dowel painted black or left natural
- Graduating strand lengths creates the triangular silhouette, so plan your longest strand first and work outward from center
Also Read: The TV Wall Glow-Up: 10 Designer Looks You Can Actually Steal
10. Hanging Paper Flower Drops for a Dramatic Corner or Event Backdrop
The most theatrical project in this entire list. And honestly, it scales beautifully from a cozy bedroom corner to a full event backdrop.
Four hanging flower strands suspend from the ceiling against a warm beige wall. Each strand has two or three large paper flowers stacked vertically, with green paper leaves interspersed between them and trailing purple paper fern-leaf fronds at the bottom. The flowers range from deep crimson roses to orange cosmos blooms, pink zinnias, purple clematis forms, white anemones, and golden lilies. Warm tones cluster on the left, cool tones on the right.
What makes it work: Scale plus movement. These are large flowers that hang freely, so any air current gives them a gentle sway. The trailing fern fronds add elegance and length without requiring any additional flower-making.
Two strands in a bedroom corner create a canopy effect. Six or eight across a full wall serve as a photo backdrop that looks genuinely expensive.
How to Make It
- Use crepe paper for the most realistic petal texture, it stretches and shapes in ways cardstock cannot
- Cut petal shapes, curl the edges over a pencil, and layer them around a fringe-cut crepe paper center
- Wire-stem each flower so you can thread them onto a single hanging cord
- Cut purple cardstock into feather patterns for the trailing fern fronds
Quick Reference: All 10 Projects by Skill Level and Cost
| Project | Main Material | Skill Level | Cost | Best Room |
|---|---|---|---|---|
| Paper Flower Spiral | Cardstock, craft wire | Intermediate | Low | Living room |
| Botanical Mirror Frame | Preserved moss, mirror | Advanced | Medium-High | Bedroom |
| Paper Snowflake Medallions | Cardstock | Beginner | Very Low | Any room |
| Paper Craft Collage | Cardstock, foam board | Beginner-Intermediate | Low | Bedroom |
| Cardboard Weather Shapes | Cardboard, paint | Beginner | Very Low | Child’s room |
| Jute Moon Hanging | Jute twine, foam base | Intermediate | Low-Medium | Living room |
| Spoon Mirror Frame | Plastic spoons, spray paint | Intermediate | Low | Bathroom |
| Autumn Branch Frame | Real branches, cardstock | Beginner | Very Low | Living room |
| Paper Cone Wind Chime | Cardstock, beads, dowel | Beginner | Very Low | Any room |
| Hanging Paper Flower Drops | Crepe paper, wire | Intermediate | Low | Bedroom |
The One Rule That Makes Every DIY Wall Decor Project Work
Looking across all ten of these projects, one pattern shows up every single time: the most visually compelling results come from repetition.
The paper cone hanging works because there are dozens of cones. The spoon mirror works because there are hundreds of spoon bowls. The botanical mirror frame works because every square inch of the frame is covered. A single paper flower is a craft project. Forty paper flowers arranged with intention are a statement. And honestly, the material cost difference between one and forty is often smaller than you’d think, but the visual impact difference is enormous.
The other thing worth knowing: none of this needs to be permanent. Removable adhesive strips, command hooks, and lightweight materials mean you can experiment, rearrange, and change your mind without damaging a single wall. Treat your first attempt as a prototype. Most people’s second version of any of these projects is noticeably better than the first anyway.
Pick the project that matches the materials you already have at home and start there. The walls have waited long enough, and honestly, so have you. Give it a shot!