

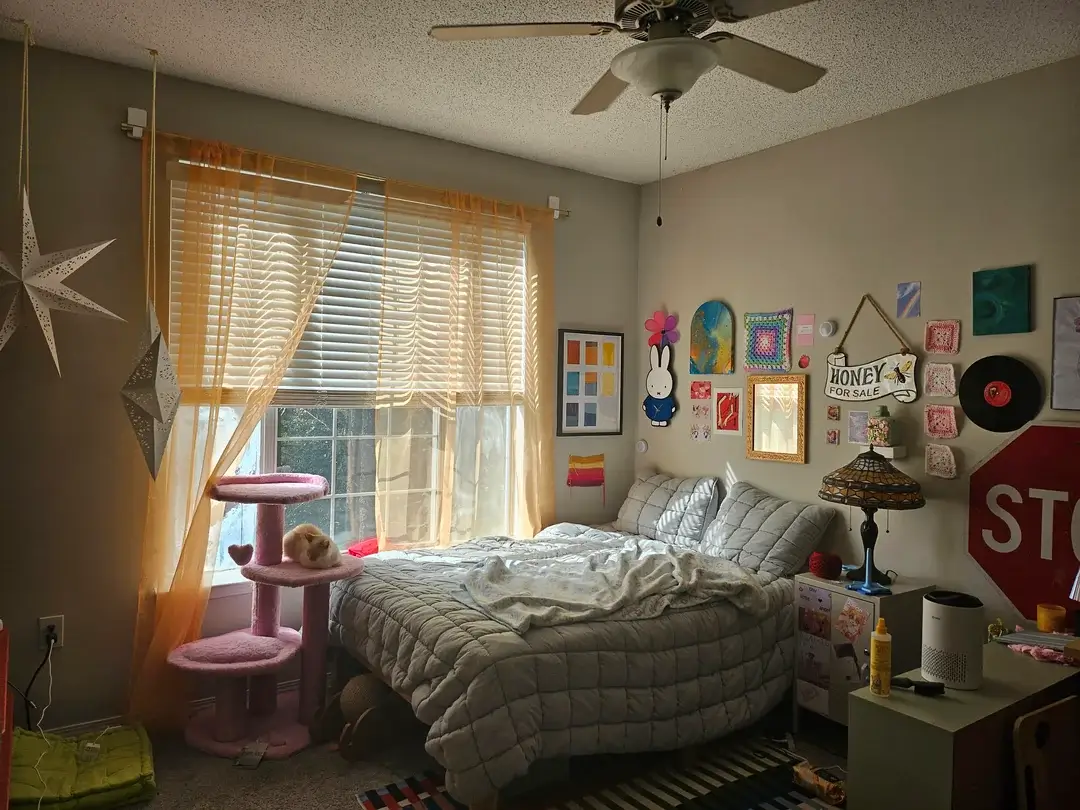
A scrapbook is more than a place to keep photographs. It gives ordinary moments a permanent home. A birthday cake, a family picnic, a concert ticket, a wedding invitation, or a tiny note from a holiday can become part of a story that you can enjoy years later. The beauty of scrapbook page layouts comes from the way you arrange those memories. You do not need professional design skills or a huge collection of supplies. Start with a few photographs, some patterned paper, stickers, washi tape, and a short handwritten note. Then build the page around one clear memory. A simple rule helps: choose your main photograph first. Then add supporting photos and decorations around it. This keeps the page easy to follow instead of making every element compete for attention. Archival and acid-free materials can also help protect photographs and paper keepsakes over time. The ideas below cover birthdays, weddings, Christmas, travel, Disney-inspired memories, graduation, Halloween, digital pages, and everyday moments. You can copy the basic structure or change the colors and decorations to make each page your own.

1. Easy Scrapbook Page Layouts for Beginners
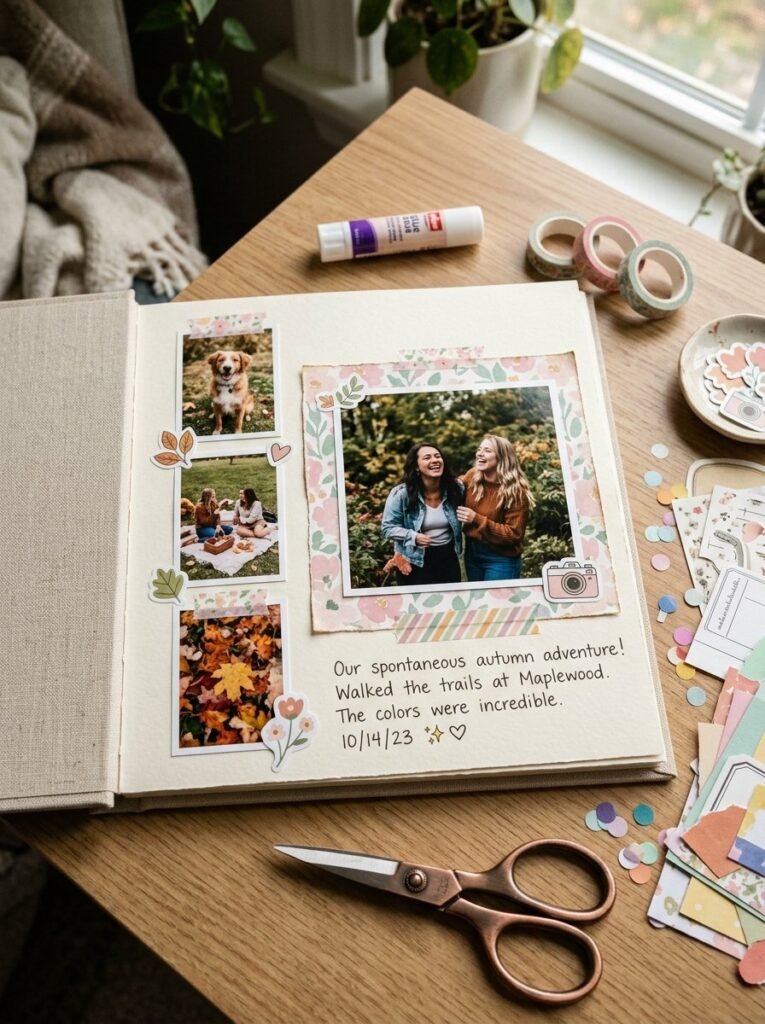
If you are making your first scrapbook, begin with a design that feels simple rather than complicated. Place one large photograph near the center, then add two or three smaller photos around it. Use patterned paper behind the photographs and add a small date card or handwritten note. These scrapbook page layouts are perfect for beginners because they teach balance, spacing, and color without requiring advanced techniques. Try a basic grid, a vertical photo strip, or a framed-photo design. Choose two or three matching colors and repeat them across the page. You can also experiment with easy templates before creating your own design. Once the main structure feels right, add a few stickers or paper shapes instead of filling every empty corner.
2. Birthday and 21st Birthday Pages
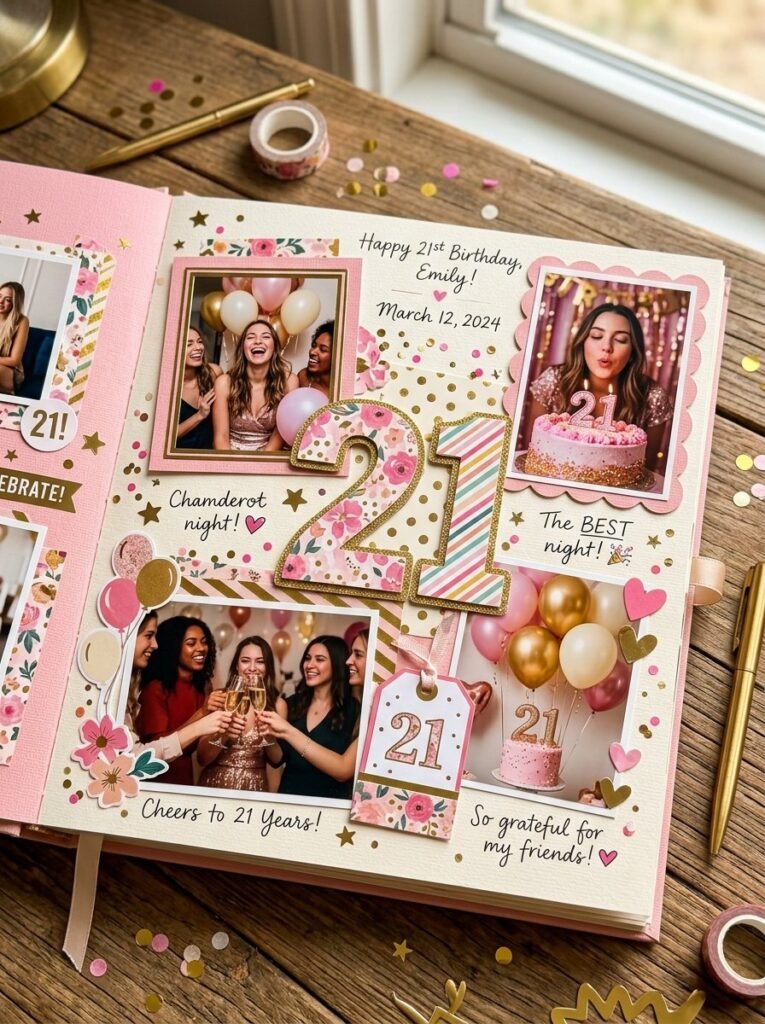
Birthday memories give you plenty of details to work with. Start with the best photograph from the celebration and make it the focal point of the page. Add smaller pictures showing the cake, decorations, friends, gifts, or funny moments. For a 21st birthday, use the number 21 as a large background element and layer photographs around it. You can add the date, a short birthday message, and a few birthday stickers to complete the story. If you have many photographs, use a double page with the celebration on one side and personal messages or favorite moments on the other. Keep the colors connected to the party theme so the page feels organized and cheerful.
3. Wedding and Anniversary Memory Pages

A wedding page should feel romantic without becoming overloaded with decorations. Use one strong wedding photograph as the main focus and surround it with smaller images showing the rings, flowers, venue, cake, or family moments. You can keep the background soft with cream, blush, white, or muted green. For an anniversary, create a timeline that shows important moments from your relationship, such as when you met, your wedding day, and memorable trips. Add short handwritten notes instead of long blocks of text. This approach turns the page into a visual story and gives every photograph a reason to be there. A small piece of the original invitation or ribbon can also add a meaningful personal touch.
4. Christmas and Halloween Scrapbook Pages
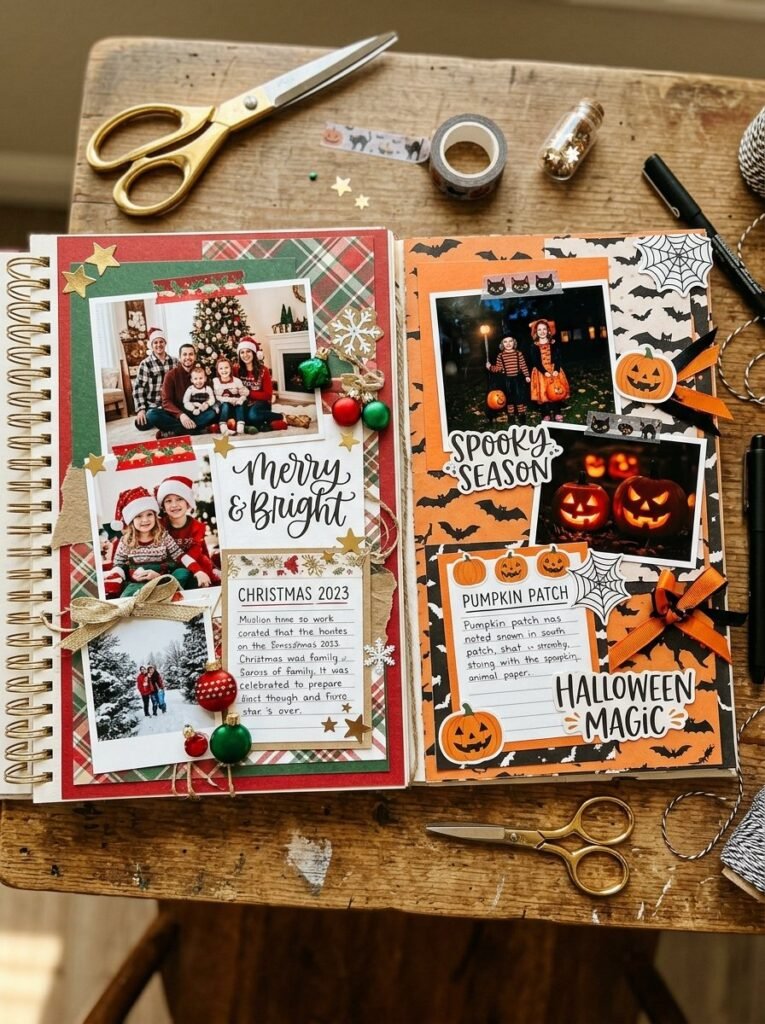
Seasonal memories give you an easy way to create bold scrapbook pages because each holiday already has a strong color palette. For Christmas, combine red, green, cream, and gold with family photographs, gift tags, ornaments, or a handwritten holiday message. For Halloween, try black, orange, purple, and white with costume photographs, pumpkin shapes, spiderweb patterns, and playful stickers. You can also create a summer page using turquoise, yellow, coral, and white for beach days, outdoor parties, or family trips. Seasonal pages work especially well when you keep the decoration style connected to the photographs rather than adding random embellishments.
5. Travel, Cruise, and Concert Pages

Travel memories become much more interesting when you save more than photographs. Keep boarding passes, maps, postcards, tickets, receipts, and small paper souvenirs from the trip. For a cruise, place a ship or ocean photograph in the center and add the route, destinations, and travel dates around it. A concert page can use the ticket as the main design element, with photographs of the venue and the people who attended. For a normal travel page, try creating a map route across the bottom and place photographs along the journey. These little details make the page feel like a real memory box instead of a collection of printed pictures.
6. Disney-Inspired and Family Memory Pages
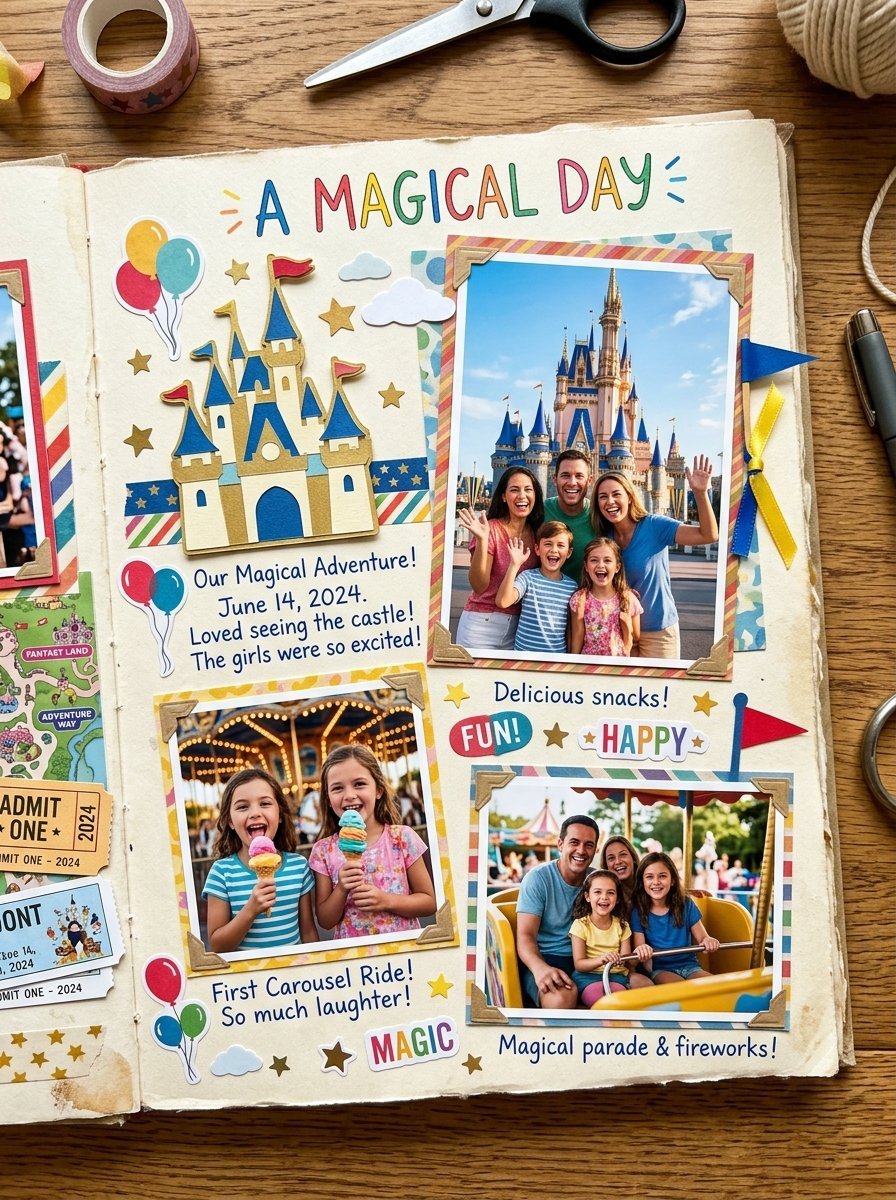
A theme-park memory deserves a playful layout, but you can keep it polished by choosing a small group of colors and repeating them throughout the page. For a Disney-inspired family trip, use photographs from the park, tickets, maps, attraction details, and simple castle or star shapes. Avoid placing too many large decorations around the photographs. Instead, use small accents to guide the eye from one picture to another. You can also create a family page around a special relationship, such as a big sister memory, first family vacation, or a child’s favorite attraction. The goal is to capture the feeling of the day while keeping the photographs easy to see.
7. Graduation, Birth Announcement, and Milestone Pages

Milestone pages work best when the design tells a clear story. For graduation, use the graduation year as a large visual element and surround it with photographs from school, friends, activities, and the ceremony. Add a short note about achievements or a favorite school memory. A birth announcement page can focus on the details that become precious later, such as the baby’s first photograph, birth date, time, and a short family message. You can also create pages for a first home, first birthday, new job, or other important events. These scrapbook page layouts become especially meaningful when you include small details that might otherwise disappear from memory.
8. Digital Scrapbook Page Layouts and Free Templates
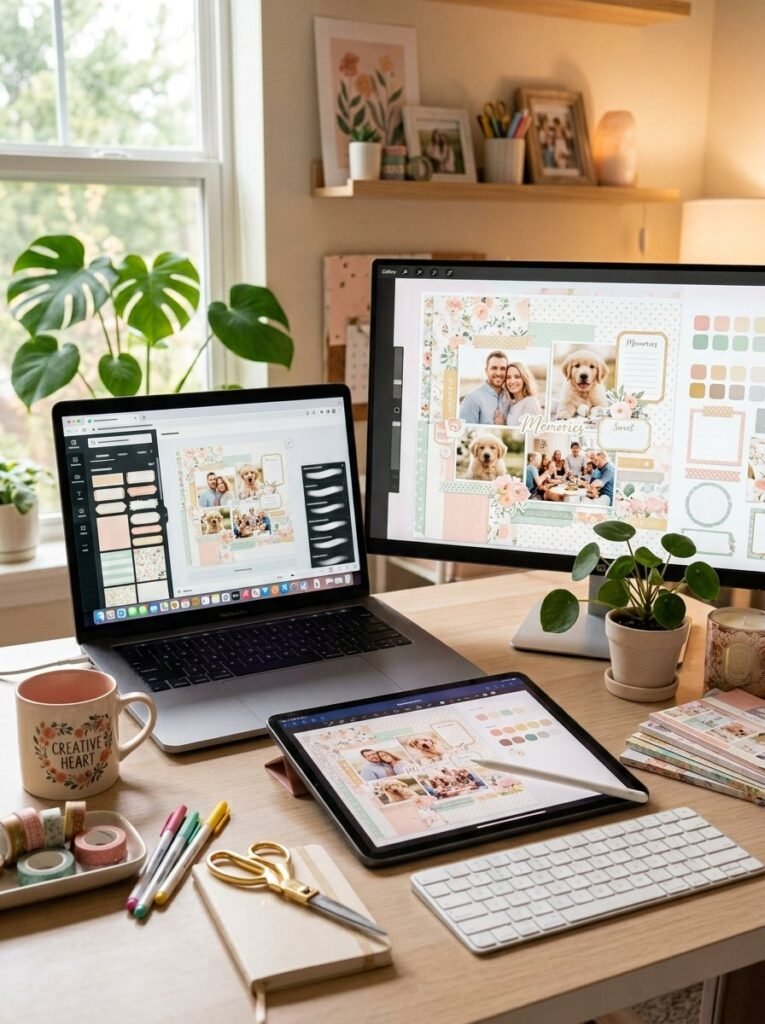
Digital scrapbooking gives you another way to preserve memories without cutting paper or storing physical supplies. You can arrange photographs on a tablet or computer, add digital paper textures, frames, stickers, shadows, and journaling elements, then save the finished page as a high-resolution image. Templates free of charge can help you learn composition, especially when you are unsure where to place photographs. You can also study collections from brands and designers such as Kiwi Lane Designs, Echo Park layouts, and Anna Griffin for ideas about layering, color, and page structure. Use those designs as inspiration and create your own arrangement rather than copying a finished page. Digital layouts also make it easy to test several versions before choosing your favorite.
9. Creative Photo Strips, Pockets, and Layered Designs
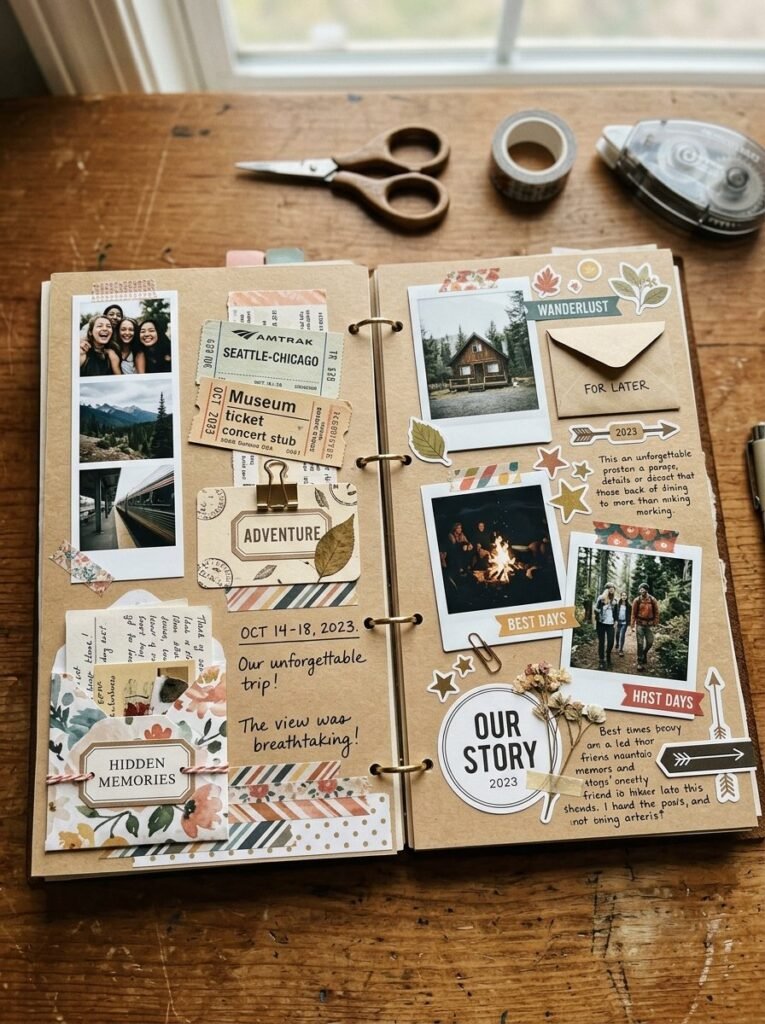
Once you feel comfortable with basic designs, start experimenting with interactive elements. A photo strip works well when you have several pictures from one moment, while a small pocket gives you somewhere to store tickets, notes, receipts, or other keepsakes. You can also create a layered design by placing a large sheet of patterned paper underneath your photographs and adding smaller paper shapes, labels, and journaling cards on top. A picnic page could use a basket-style paper pattern, while a concert page could use ticket-shaped labels. The important thing is to create a visual path through the page so the reader knows where to look first, second, and third.
10. Minimalist and Aesthetic Scrapbook Pages

Not every scrapbook needs bright colors and lots of decorations. A minimalist page can look just as personal with fewer elements. Use one or three photographs, a neutral background, a small amount of washi tape, and one short journal entry. Soft beige, cream, dusty pink, sage green, or light blue can create an aesthetic look without distracting from the photographs. Leave some open space around the main elements. That empty area gives the page a cleaner appearance and helps important details stand out. This style also works well for everyday memories, couples, family photographs, travel moments, and quiet personal stories.
11. How to Make Your Scrapbook Pages Look More Professional

Good design starts before you glue anything down. Place every photograph and decoration on the page first, then move the pieces until the composition feels balanced. Keep your strongest photograph as the focal point and use smaller elements to support it. Choose colors that appear in the photographs instead of selecting decorations at random. For long-term preservation, look for acid-free or archival-quality supplies when possible, especially for important photographs and original documents. Keep your completed scrapbook away from strong sunlight and excessive moisture. A little planning can make your page cleaner, easier to read, and more durable.
12. Picnic Memory Scrapbook Layout

A picnic is full of small details that are easy to forget, so it makes a wonderful scrapbook theme. Use photographs of the food, blanket, flowers, people, and outdoor setting instead of relying on one large photograph. Gingham paper can create a classic picnic feeling, while small fruit, flower, or basket embellishments add personality. Keep a little space for a short note about where you went and what made the day memorable.
13. Big Sister Memory Page
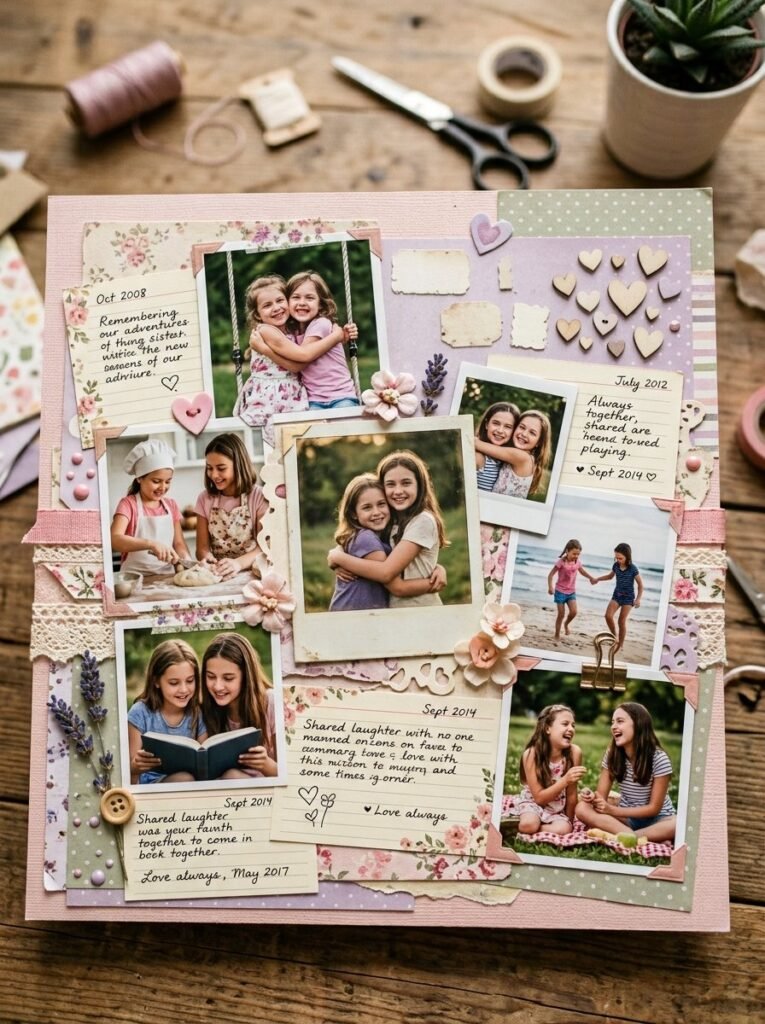
A scrapbook page dedicated to a big sister can capture years of small memories in one place. Combine childhood photographs with newer pictures to create a simple visual timeline. Add short notes about funny moments, family traditions, or things you appreciate about each other. Instead of covering the page with decorations, let the photographs carry most of the story and use small hearts or flowers as supporting details.
14. Summer Vacation Scrapbook Layout
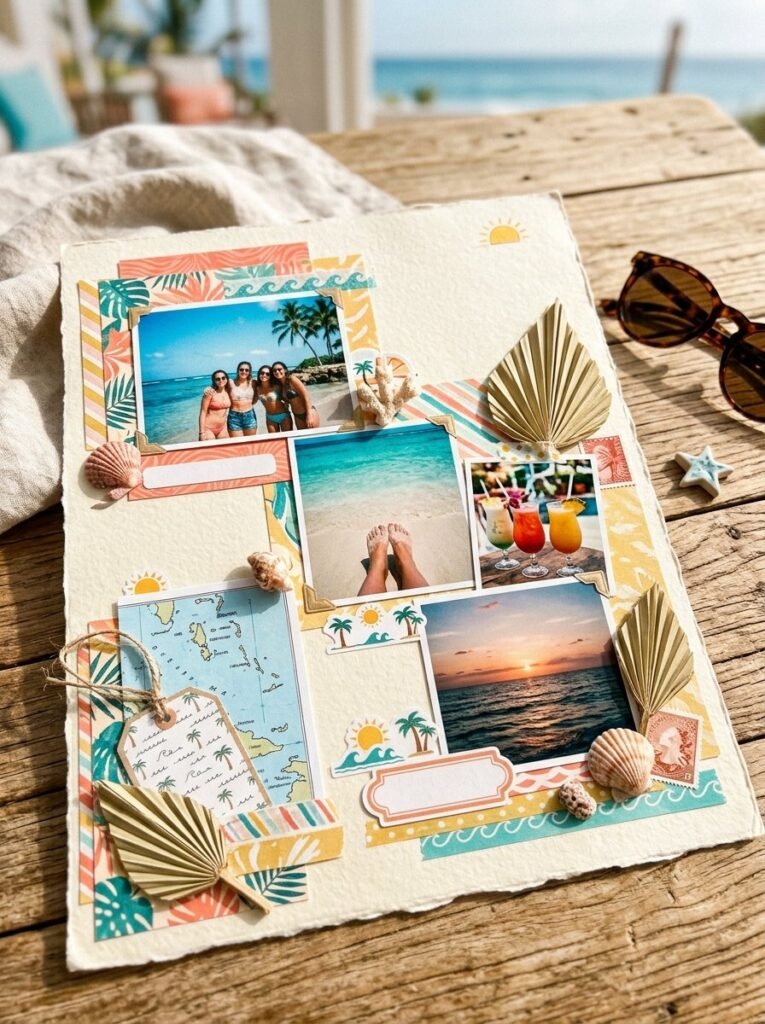
A summer vacation page can combine photographs with small objects that remind you of the trip. Add seashell-inspired decorations, postcards, maps, travel tags, or a small piece of packaging from the destination. Arrange the photographs from the beginning of the trip to the final day if you want the page to feel like a journey. A consistent blue and warm yellow palette can tie beach photographs together beautifully.
15. Double-Page Memory Story

Some memories simply need more space than one page can provide. A double-page layout lets you include more photographs while keeping the story organized. Use the left side to introduce the event and the right side to show the best moments or final details. Repeat one color, pattern, or decorative element across both pages so they feel connected rather than like two unrelated designs.
16. Anniversary Timeline Scrapbook
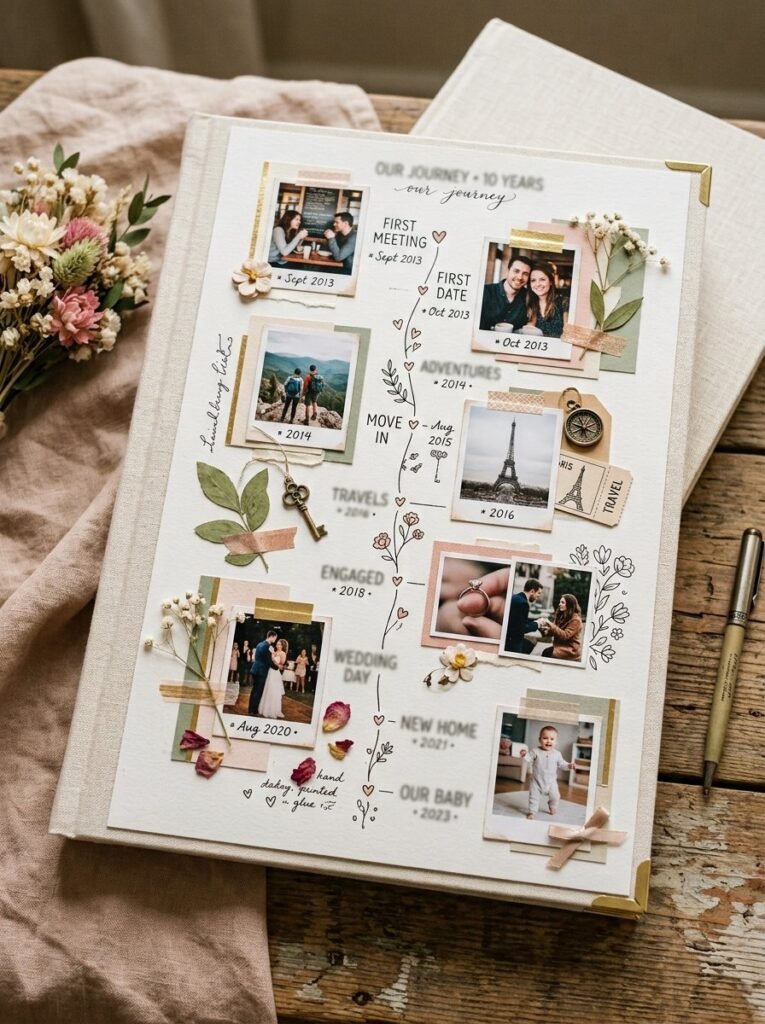
Instead of focusing on one anniversary photograph, create a timeline that tells the story of your relationship. Start with an early photograph and gradually move through important moments such as trips, celebrations, a wedding, or other meaningful occasions. Small dates and short captions can help explain each milestone. This approach gives the page a strong narrative and makes it feel more personal than a standard photo collage.
17. Everyday Memory Scrapbook Layout
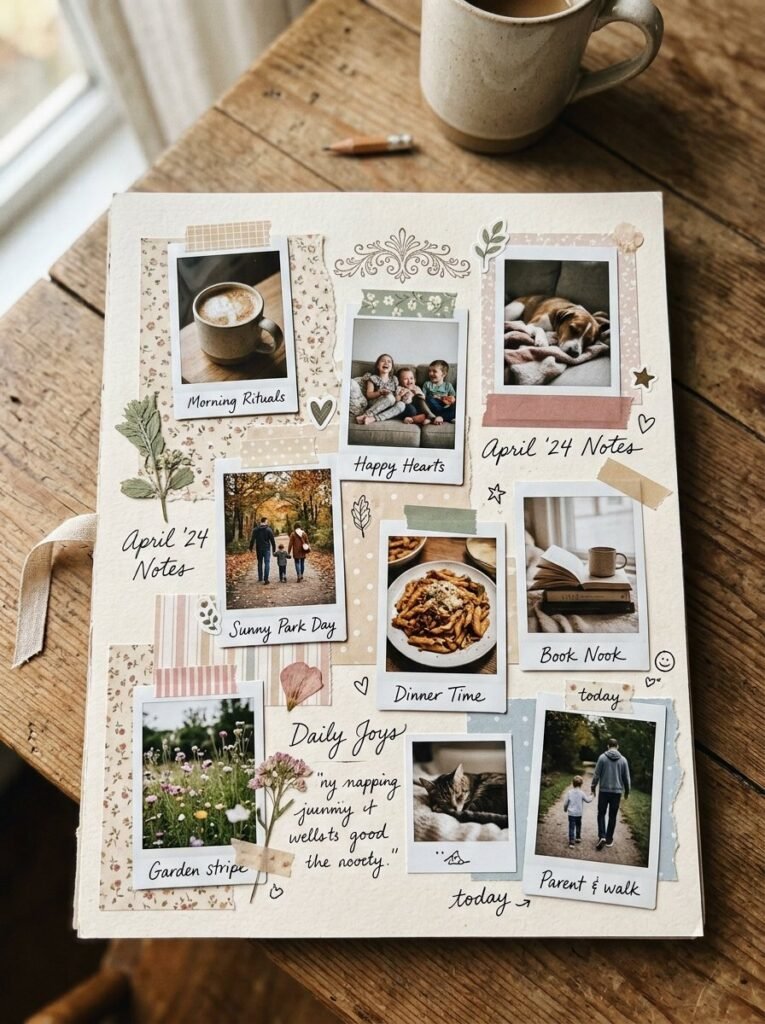
Not every scrapbook page needs to document a major celebration. Everyday moments can become some of the most valuable memories later. Create a page around ordinary photographs such as a favorite meal, morning coffee, a family walk, a pet, or a quiet afternoon. Use a simple layout with small photographs and short captions. This style works especially well when you want to document daily life without making the page feel overly formal.
18. Special Keepsake and Memory Pocket Page
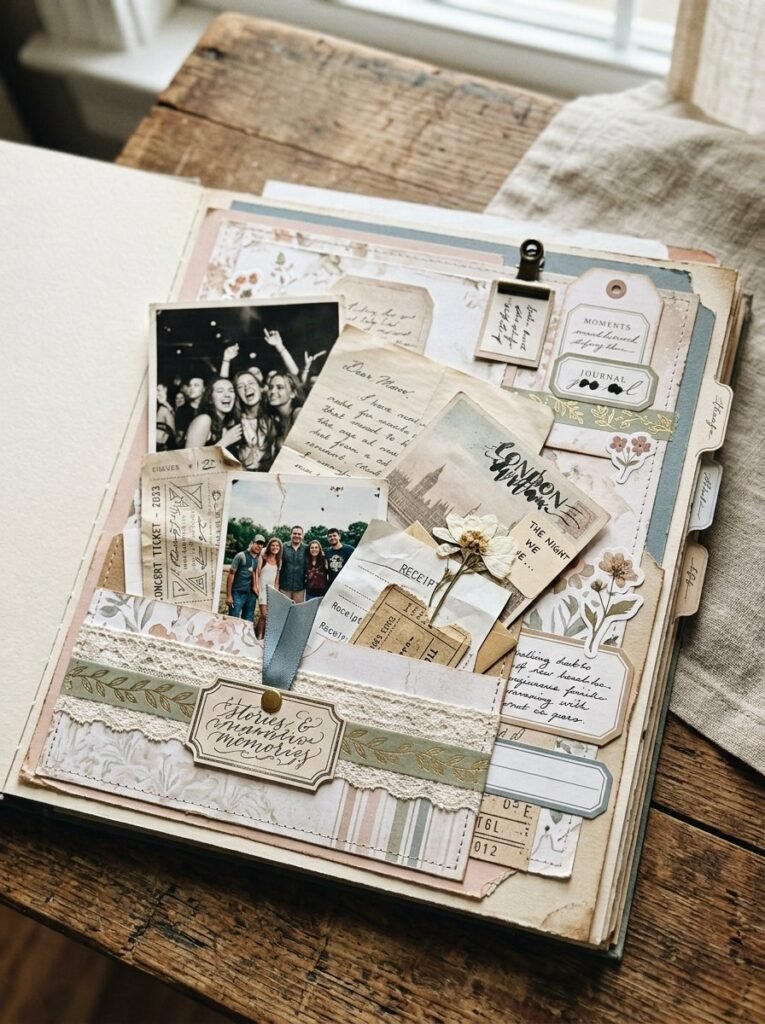
A pocket layout is perfect when your memory includes more than photographs. Create a decorative pocket and use it to hold tickets, notes, postcards, receipts, pressed flowers, or other small keepsakes. You can still place one or two photographs directly on the page so the main memory remains visible. This layout gives you flexibility because the hidden items can be removed and viewed whenever you want to revisit the story.
Final Thoughts
Creating scrapbook page layouts is really about turning scattered photographs and small keepsakes into one connected story. You can create a birthday page today, a travel page next week, and a Christmas memory page months later. Each one becomes a small chapter in your personal history. Start simple. Choose one photograph that matters. Add a few supporting details, write down what happened, and leave enough space for the page to breathe. You do not need perfect handwriting or expensive supplies. You need a memory, a little creativity, and a layout that helps that memory tell its story. The most meaningful pages are often not the most decorated ones. They are the pages that make you stop, smile, and remember exactly where you were when that photograph was taken. That is the real purpose of scrapbook page layouts: preserving moments in a way that feels personal, beautiful, and completely yours.


2 Pingbacks